Plugin Integration
This document will guide you step by step to complete the installation of Atome.
Step 1: Plugin Zip Download
Download for woocommerce 3.6-4.0
Step 2: Add plugins
operation: [WooCommerce Admin Dashboard]——>click [Add New]——>click [Upload Plugin]
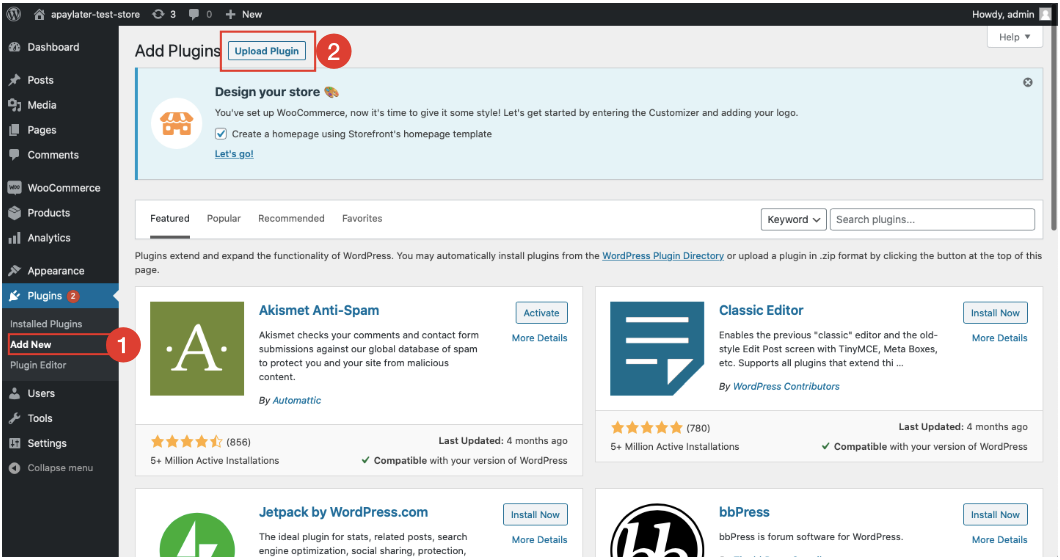
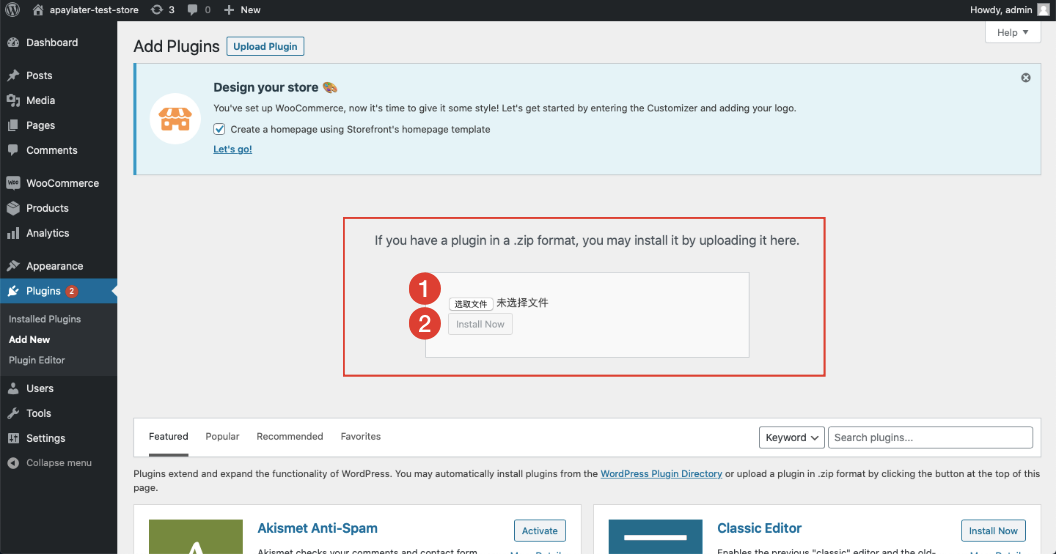
Step 3: Upload plugins
(1) Upload the Atome.zip file and click [Install Now]
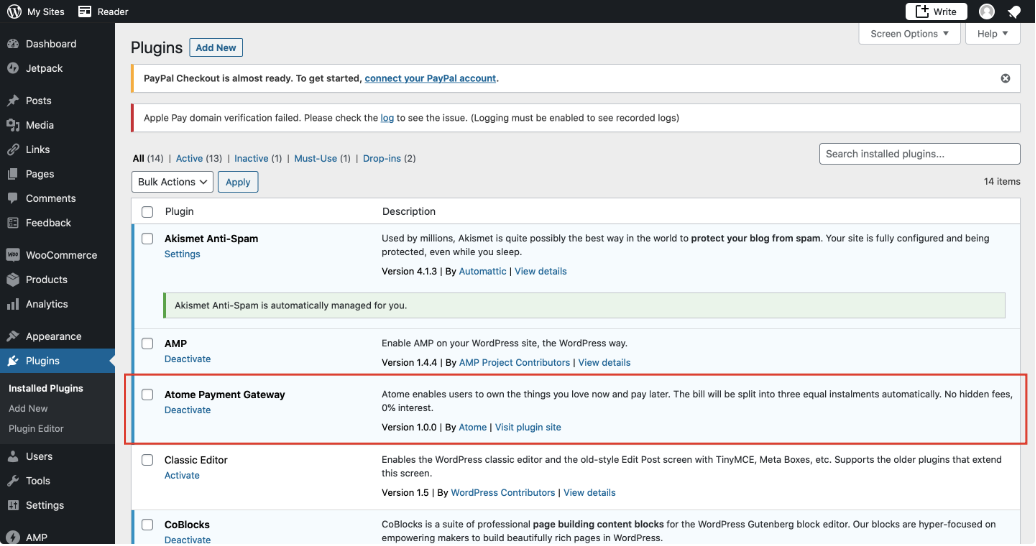
(2) After uploading successfully. The [Atome Payment Gateway] will display in the Plugin list.
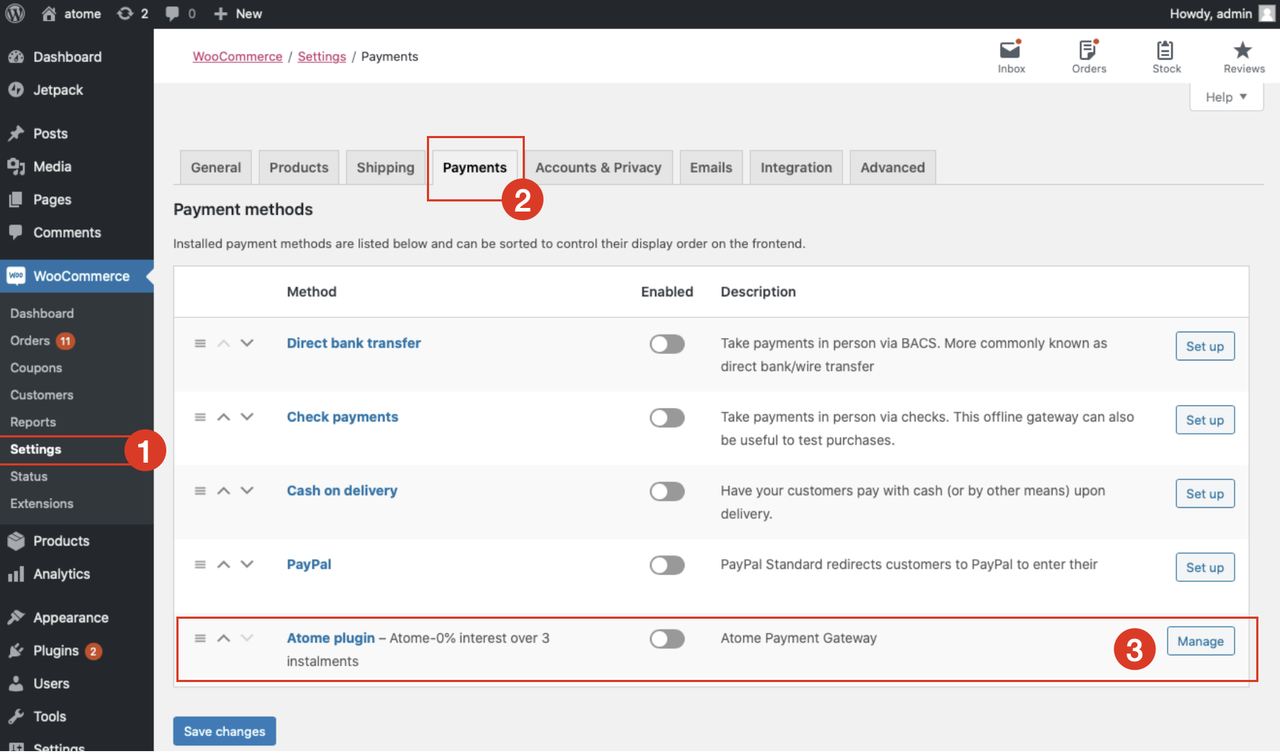
Step 4: Atome plugin configuration
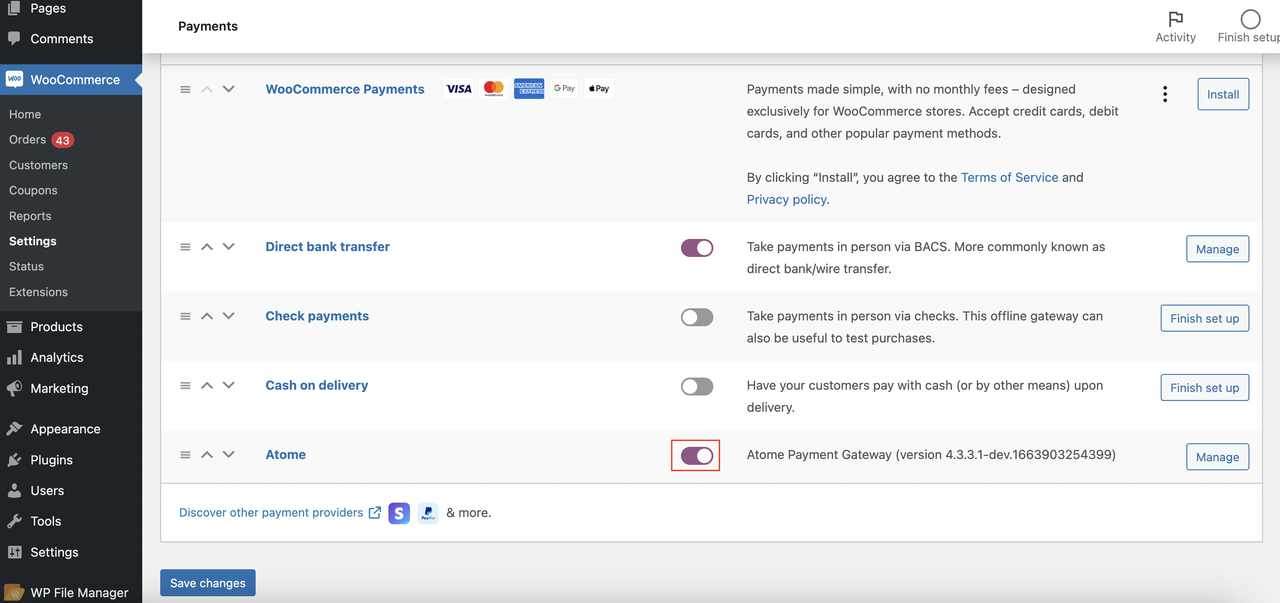
(1) Click [Setting] under WooCommerce——> Choose tab [Payments]——> Click [Manage] under [Atome]
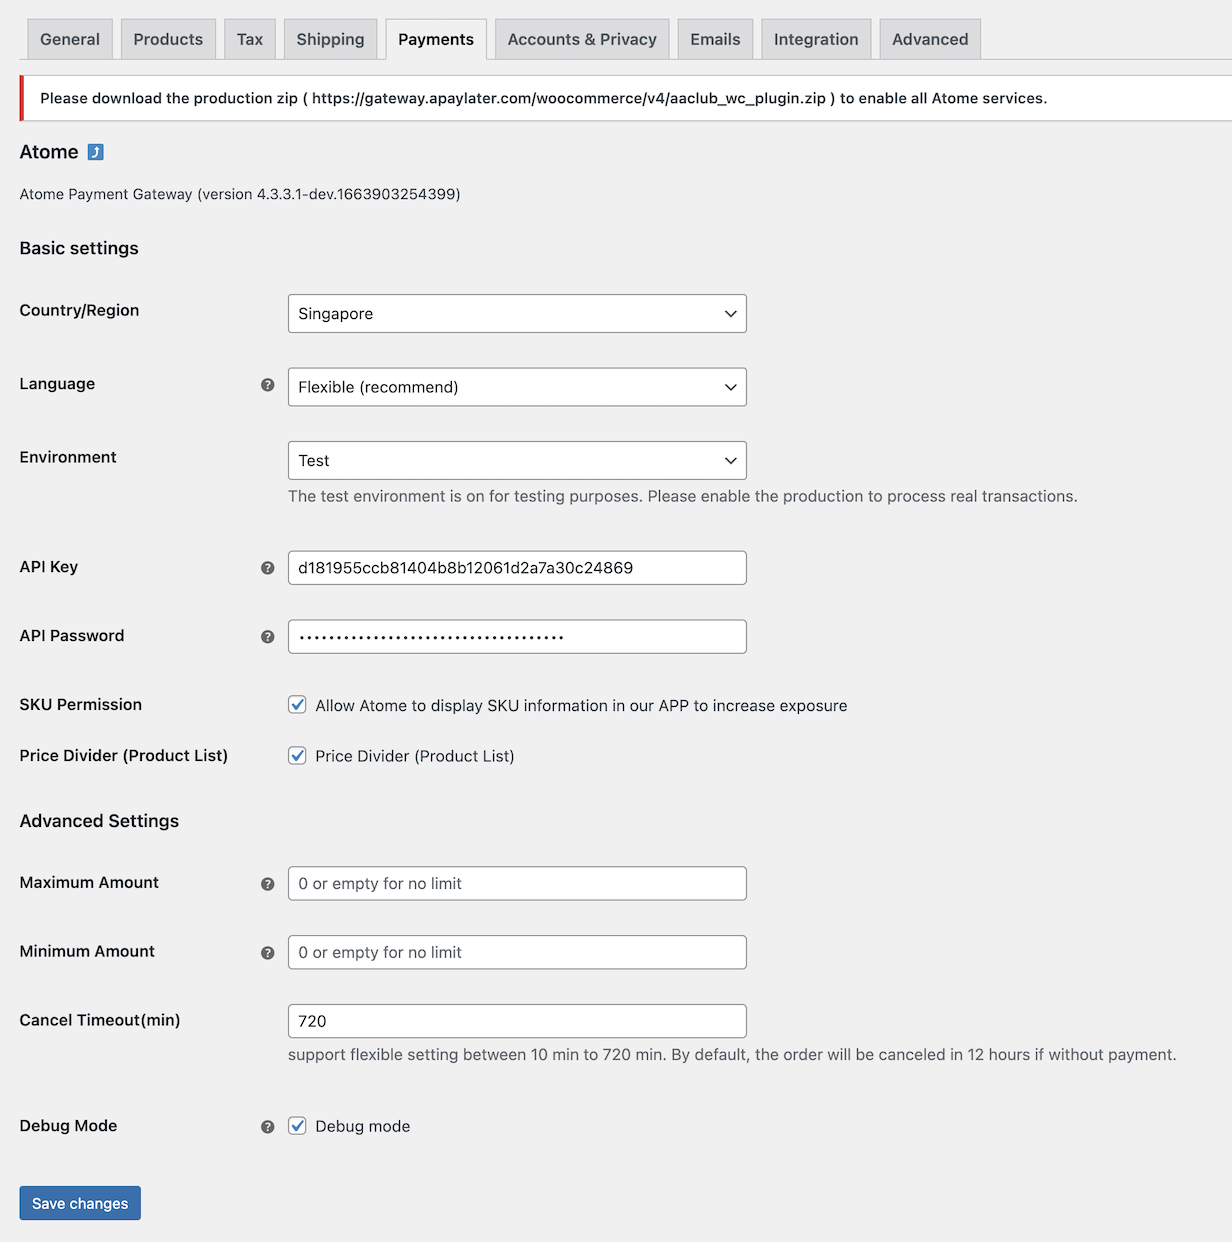
(2) configuration
Note (REQUIRED)
- Country/Region: country of your website, related to processing currency
- Language: related to price divider /checkout tag
- Environment: Test/Production
- API Key: credential to enable Atome service
- API Password: credential to enable Atome service
- SKU Permission: : (RECOMMEND) enable the product list display in Atome APP to help merchants increase conversion rate.
Note (OPTIONAL)
- Price Divider: (RECOMMEND) showing installment price in the listing to increase conversion rate.
- Maximum/Minimum Amount: (OPTIONAL) order cannot be paid by Atome payment method when the order total is not within max/min amount setting.
- Cancel Timeout: (OPTIONAL) the default value is 720 min, which means the order will be automatically canceled after 12 hours without paying.
- Debug Mode: (RECOMMEND) recording a full detailed log for easy debugging.
After all done, Click [Save]
(3) Enable Atome
Back to the Payment. Methods and enable the [Atome plugin]. Then you can use Atome.